Getting Started with Arduino: The Ultimate Beginner's Guide
If you have ever wanted to build your own electronic gadgets — a weather station, a robot, a home automation system, or even a simple blinking LED — Arduino is the best place to start. Millions of hobbyists, students, and professionals around the world use Arduino as their gateway into electronics and embedded programming.
In this guide, we will take you from zero to confidently writing Arduino programs, reading sensors, and controlling outputs. No prior experience with electronics or programming is required.
What Is Arduino?
Arduino is an open-source electronics platform that combines easy-to-use hardware (a microcontroller board) with a simple software environment (the Arduino IDE). You write code on your computer, upload it to the board over USB, and the board runs your program independently.
What makes Arduino special:
- Beginner-friendly: The programming language is a simplified version of C/C++, and the IDE hides most of the complexity.
- Massive community: Thousands of tutorials, libraries, and forum posts exist for virtually any project you can imagine.
- Affordable: An Arduino Uno clone costs under Rs 500, and sensors start at Rs 30-50.
- No soldering required: With a breadboard and jumper wires, you can prototype circuits without any permanent connections.
- Cross-platform: The Arduino IDE runs on Windows, macOS, and Linux.
Arduino Uno vs Nano vs Mega: Which Board Should You Start With?
Arduino makes several boards, and third-party manufacturers produce many more. Here are the three most popular boards for beginners:
| Feature | Arduino Uno | Arduino Nano | Arduino Mega 2560 |
|---|---|---|---|
| Microcontroller | ATmega328P | ATmega328P | ATmega2560 |
| Digital I/O Pins | 14 (6 PWM) | 14 (6 PWM) | 54 (15 PWM) |
| Analog Input Pins | 6 | 8 | 16 |
| Flash Memory | 32 KB | 32 KB | 256 KB |
| SRAM | 2 KB | 2 KB | 8 KB |
| Clock Speed | 16 MHz | 16 MHz | 16 MHz |
| USB Connector | Type-B | Mini-USB / Type-C | Type-B |
| Size | 68.6 x 53.4 mm | 45 x 18 mm | 101.5 x 53.3 mm |
| Best For | Learning, prototyping | Compact projects, breadboard use | Large projects, many sensors |
| Price Range (India) | Rs 350-500 | Rs 250-400 | Rs 600-900 |
Our recommendation: Start with the Arduino Uno. It is the most documented board in the world, every tutorial assumes you have one, and its full-size pin headers make wiring easy. Once you are comfortable, the Nano is perfect for fitting into smaller projects, and the Mega is for when you run out of pins.
Understanding the Arduino Uno Board
Before writing any code, let us understand what is on the board.
Power Pins
- 5V: Outputs regulated 5 volts. Use this to power sensors and small modules.
- 3.3V: Outputs regulated 3.3 volts. Some sensors (like certain accelerometers) need this.
- GND: Ground. Every circuit needs a ground connection. There are multiple GND pins on the board.
- Vin: You can supply 7-12V here to power the board without USB.
Digital Pins (0-13)
These pins can be set to HIGH (5V) or LOW (0V). You use them to turn LEDs on/off, read button presses, and communicate with modules. Pins marked with a tilde (~) — pins 3, 5, 6, 9, 10, 11 — support PWM (Pulse Width Modulation), which lets you simulate analog output.
Analog Pins (A0-A5)
These pins can read varying voltages between 0V and 5V. The board converts the voltage to a number between 0 and 1023 using its built-in ADC (Analog-to-Digital Converter). Use these to read potentiometers, light sensors, temperature sensors, and more.
Other Important Parts
- USB Port: Connects to your computer for programming and serial communication.
- Reset Button: Restarts your current program from the beginning.
- Built-in LED (Pin 13): A small LED on the board connected to digital pin 13. Perfect for testing without any external wiring.
- TX/RX LEDs: Blink when data is being sent (TX) or received (RX) over USB.
Installing the Arduino IDE 2.x
The Arduino IDE is where you write, compile, and upload your code (called sketches).
Step 1: Download
Go to https://www.arduino.cc/en/software and download Arduino IDE 2.x for your operating system (Windows, macOS, or Linux).
Step 2: Install
- Windows: Run the
.exeinstaller and follow the prompts. When asked about drivers, click "Install" — these are needed for your computer to talk to the board. - macOS: Open the
.dmgfile and drag Arduino IDE to your Applications folder. - Linux: Extract the
.AppImagefile, make it executable withchmod +x, and run it.
Step 3: Connect Your Board
Plug your Arduino Uno into your computer using a USB cable. You should see the power LED on the board light up.
Step 4: Select Your Board
- Open the Arduino IDE.
- Go to Tools > Board > Arduino AVR Boards > Arduino Uno.
- Go to Tools > Port and select the port that shows your Arduino (it will say "Arduino Uno" next to it on most systems).
On Windows, the port looks like COM3 or COM4. On macOS/Linux, it looks like /dev/ttyUSB0 or /dev/ttyACM0.
If you do not see a port, you may need to install the CH340 driver (for clone boards). Search "CH340 driver download" and install it for your OS.
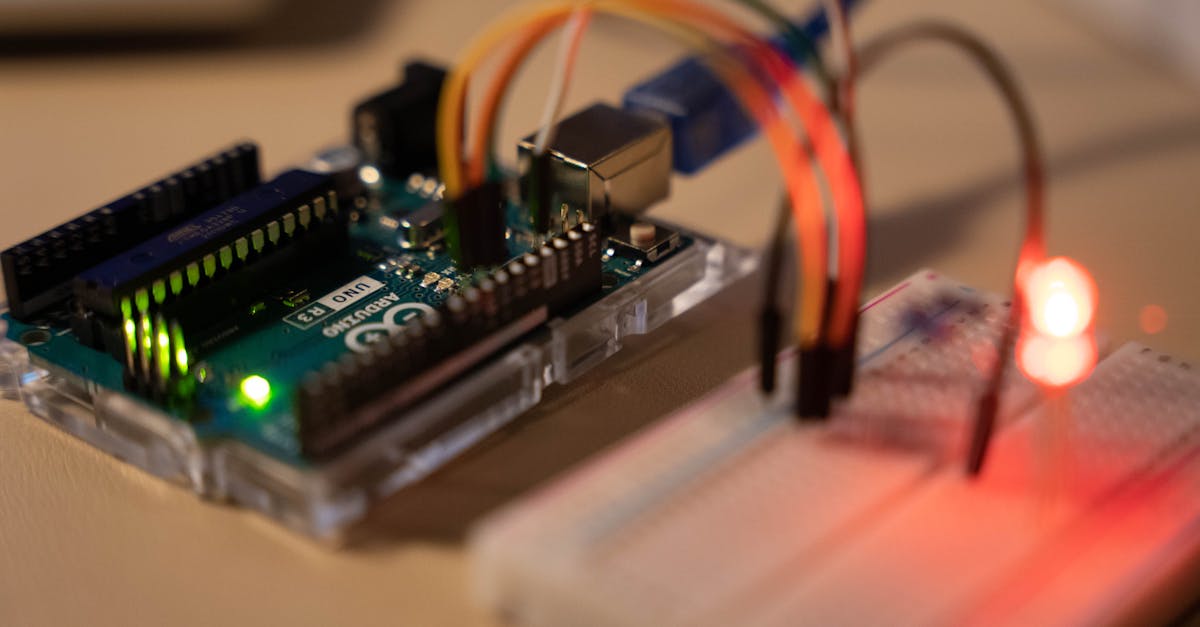
Your First Sketch: Blink
Every Arduino journey begins with Blink. This program turns the built-in LED on and off every second.
The Code
// Blink — turns the built-in LED on for one second, then off for one second, repeatedly.

void setup() {
  // This runs ONCE when the board starts up
  pinMode(13, OUTPUT);  // Set pin 13 as an output
}

void loop() {
  // This runs OVER AND OVER after setup() finishes
  digitalWrite(13, HIGH);  // Turn LED on (5V)
  delay(1000);             // Wait 1000 milliseconds (1 second)
  digitalWrite(13, LOW);   // Turn LED off (0V)
  delay(1000);             // Wait 1 second
}
Upload It
- Copy the code into the Arduino IDE.
- Click the checkmark button (Verify) to compile. Fix any errors if shown.
- Click the arrow button (Upload). The TX/RX LEDs on the board will blink rapidly.
- After "Done uploading" appears, the built-in LED should start blinking.
Understanding the Code
setup(): Runs once when the board powers on or is reset. Use it to configure pins and initialize settings.loop(): Runs continuously aftersetup()finishes. Your main program logic goes here.pinMode(pin, mode): Configures a pin asINPUTorOUTPUT.digitalWrite(pin, value): Sets a digital pin toHIGH(5V) orLOW(0V).delay(ms): Pauses the program for the given number of milliseconds.
Challenge: Change the delay values to make the LED blink faster. Try delay(200) for a rapid blink.
Reading a Button with digitalRead()
Now let us add input. We will read a push button to control the LED.
Wiring
- Connect one leg of a push button to digital pin 2.
- Connect the other leg to GND.
- Connect an LED's long leg (anode) to pin 13 through a 220 ohm resistor, and the short leg (cathode) to GND. (Or just use the built-in LED on pin 13.)
The Code
const int buttonPin = 2;
const int ledPin = 13;

void setup() {
  pinMode(ledPin, OUTPUT);
  pinMode(buttonPin, INPUT_PULLUP);  // Enable internal pull-up resistor
}

void loop() {
  int buttonState = digitalRead(buttonPin);

  if (buttonState == LOW) {    // Button pressed (pulled to ground)
    digitalWrite(ledPin, HIGH);
  } else {
    digitalWrite(ledPin, LOW);
  }
}
What Is a Pull-Up Resistor?
When a digital pin is not connected to anything, it "floats" and reads random HIGH/LOW values. A pull-up resistor connects the pin to 5V by default, so it reads HIGH when the button is not pressed. When you press the button, it connects the pin to GND, pulling it LOW.
Using INPUT_PULLUP activates the Arduino's internal pull-up resistor, so you do not need an external one. This is why the logic is inverted: LOW means pressed, HIGH means released.
Simple Software Debouncing
Mechanical buttons "bounce" — they make and break contact several times in a few milliseconds when pressed. This can cause multiple triggers. Here is a simple debounce approach:
const int buttonPin = 2;
const int ledPin = 13;
bool ledState = false;
bool lastButtonState = HIGH;
unsigned long lastDebounceTime = 0;
const unsigned long debounceDelay = 50;

void setup() {
  pinMode(ledPin, OUTPUT);
  pinMode(buttonPin, INPUT_PULLUP);
}

void loop() {
  bool reading = digitalRead(buttonPin);

  if (reading != lastButtonState) {
    lastDebounceTime = millis();
  }

  if ((millis() - lastDebounceTime) > debounceDelay) {
    if (reading == LOW && lastButtonState == HIGH) {
      ledState = !ledState;  // Toggle LED
      digitalWrite(ledPin, ledState ? HIGH : LOW);
    }
  }

  lastButtonState = reading;
}
Now each button press toggles the LED on or off cleanly.
Analog Input: Reading a Potentiometer
A potentiometer (pot) is a variable resistor with a knob. Turning the knob changes the voltage output between 0V and 5V.
Wiring
- Connect the left pin of the potentiometer to 5V.
- Connect the right pin to GND.
- Connect the middle pin (wiper) to analog pin A0.
The Code
const int potPin = A0;

void setup() {
  Serial.begin(9600);  // Start serial communication at 9600 baud
}

void loop() {
  int sensorValue = analogRead(potPin);  // Returns 0-1023
  Serial.println(sensorValue);           // Print to Serial Monitor
  delay(100);
}
Understanding analogRead()
- The Arduino's ADC converts the voltage on the analog pin to a 10-bit number.
- 0V = 0, 5V = 1023, and everything in between is proportional.
- A pot turned halfway will read approximately 512.
Mapping Values
Often you need to convert the 0-1023 range to something useful. The map() function does this:
int sensorValue = analogRead(potPin);            // 0-1023
int percentage = map(sensorValue, 0, 1023, 0, 100);  // 0-100
Serial.print("Position: ");
Serial.print(percentage);
Serial.println("%");
PWM Output: LED Fading with analogWrite()
Digital pins can only output HIGH or LOW. But PWM (Pulse Width Modulation) rapidly switches between HIGH and LOW to simulate intermediate voltages. The analogWrite() function accepts a value from 0 (off) to 255 (full brightness).
Wiring
Connect an LED (with a 220 ohm resistor) to pin 9 (a PWM-capable pin, marked with ~).
The Code
const int ledPin = 9;

void setup() {
  pinMode(ledPin, OUTPUT);
}

void loop() {
  // Fade in
  for (int brightness = 0; brightness <= 255; brightness += 5) {
    analogWrite(ledPin, brightness);
    delay(30);
  }

  // Fade out
  for (int brightness = 255; brightness >= 0; brightness -= 5) {
    analogWrite(ledPin, brightness);
    delay(30);
  }
}
The LED smoothly fades in and out. Remember: analogWrite() only works on PWM pins (3, 5, 6, 9, 10, 11 on the Uno).
The Serial Monitor: Your Best Debugging Tool
The Serial Monitor is a window in the Arduino IDE that lets you send and receive text between your computer and the Arduino.
Printing Messages
void setup() {
  Serial.begin(9600);           // Initialize at 9600 baud
  Serial.println("Arduino is ready!");
}

void loop() {
  int sensorValue = analogRead(A0);
  Serial.print("Sensor: ");     // Print without newline
  Serial.println(sensorValue);  // Print with newline
  delay(500);
}
Open the Serial Monitor with Tools > Serial Monitor (or Ctrl+Shift+M). Make sure the baud rate dropdown at the bottom matches your Serial.begin() value.
Reading Input from the Serial Monitor
You can also send commands from the computer to the Arduino:
void setup() {
  Serial.begin(9600);
  pinMode(13, OUTPUT);
  Serial.println("Send '1' to turn LED ON, '0' to turn LED OFF");
}

void loop() {
  if (Serial.available() > 0) {
    char received = Serial.read();

    if (received == '1') {
      digitalWrite(13, HIGH);
      Serial.println("LED is ON");
    } else if (received == '0') {
      digitalWrite(13, LOW);
      Serial.println("LED is OFF");
    }
  }
}
Type 1 or 0 in the Serial Monitor input field and press Enter to control the LED.
Combining Concepts: Control an LED with a Potentiometer
Now let us combine analog input and PWM output to control an LED's brightness with a potentiometer.
Wiring
- Potentiometer middle pin to A0 (left to 5V, right to GND).
- LED (with 220 ohm resistor) to pin 9.
The Code
const int potPin = A0;
const int ledPin = 9;

void setup() {
  pinMode(ledPin, OUTPUT);
  Serial.begin(9600);
}

void loop() {
  int sensorValue = analogRead(potPin);               // 0-1023
  int brightness = map(sensorValue, 0, 1023, 0, 255); // Scale to 0-255

  analogWrite(ledPin, brightness);

  Serial.print("Pot: ");
  Serial.print(sensorValue);
  Serial.print(" -> Brightness: ");
  Serial.println(brightness);

  delay(50);
}
Turn the potentiometer knob and watch the LED smoothly change brightness. This is the foundation for controlling motors, servos, and many other actuators.
Common Beginner Mistakes (and How to Fix Them)
1. Wrong Board Selected
Symptom: Upload fails with "avrdude: stk500_recv(): programmer is not responding." Fix: Go to Tools > Board and make sure the correct board is selected. Clone boards often need "Arduino Uno" even if they look slightly different.
2. Wrong Port Selected
Symptom: "No port selected" or upload hangs. Fix: Go to Tools > Port. If no port shows up, try a different USB cable (some cables are charge-only with no data lines).
3. Missing CH340/CP2102 Drivers
Symptom: Board connects but no port appears. Fix: Most clone Arduino boards use the CH340 USB-to-serial chip instead of the genuine FTDI chip. Download and install the CH340 driver for your OS.
4. Wrong Pin Numbers
Symptom: Code compiles but nothing happens on the circuit. Fix: Double-check your wiring matches the pin numbers in your code. Remember that analog pins are A0-A5, not 0-5.
5. Floating Inputs
Symptom: Digital input reads random values when the button is not pressed.
Fix: Use INPUT_PULLUP instead of INPUT, or add an external pull-up/pull-down resistor.
6. Missing Resistor on LEDs
Symptom: LED is extremely bright and then burns out. Fix: Always use a 220 ohm resistor (or 330 ohm) in series with LEDs. Without it, too much current flows and the LED dies.
7. Using analogWrite() on Non-PWM Pins
Symptom: LED does not fade, just turns on or off. Fix: Only pins 3, 5, 6, 9, 10, 11 support PWM on the Uno. Look for the tilde (~) symbol next to the pin number on the board.
8. Baud Rate Mismatch
Symptom: Serial Monitor shows garbage characters.
Fix: Make sure the baud rate in the Serial Monitor dropdown matches the value in Serial.begin(). Use 9600 for most cases.
9. Forgetting to Call pinMode()
Symptom: Output pins do not work, or inputs behave strangely.
Fix: Every pin you use must be configured in setup() with pinMode().
10. Using delay() for Everything
Symptom: Program feels unresponsive; cannot read buttons while delaying.
Fix: Learn to use millis() for non-blocking timing once you are comfortable with the basics.
10 Beginner Project Ideas
Ready to build something? Here are ten projects in order of increasing difficulty.
| # | Project | Difficulty | Components Needed |
|---|---|---|---|
| 1 | Traffic light simulation (3 LEDs) | Easy | 3 LEDs, 3 resistors |
| 2 | Light-activated night lamp (LDR) | Easy | LDR, LED, 10K resistor |
| 3 | Temperature display on Serial Monitor | Easy | DHT11 sensor |
| 4 | Servo motor control with potentiometer | Easy | Servo motor, potentiometer |
| 5 | Ultrasonic distance meter | Medium | HC-SR04 sensor, LCD or serial output |
| 6 | Obstacle-avoiding robot | Medium | 2 DC motors, L298N driver, HC-SR04, chassis |
| 7 | LCD weather station (temp + humidity) | Medium | DHT22, 16x2 LCD with I2C |
| 8 | IR remote-controlled LED strip | Medium | IR receiver, IR remote, LED strip, MOSFET |
| 9 | Bluetooth-controlled car | Hard | HC-05 Bluetooth, motors, L298N, chassis |
| 10 | Home automation with relay control | Hard | 4-channel relay module, ESP8266 WiFi module |
All these components are available at wavtron.in. We ship across India from Bengaluru.
Arduino vs ESP32: When to Upgrade
Once you are comfortable with Arduino, you will eventually want more power. The ESP32 is the natural next step.
| Feature | Arduino Uno | ESP32 |
|---|---|---|
| Processor | 8-bit AVR, 16 MHz | 32-bit dual-core, 240 MHz |
| RAM | 2 KB | 520 KB |
| WiFi | No (needs external module) | Built-in WiFi + Bluetooth |
| GPIO Pins | 20 | 30+ |
| ADC Resolution | 10-bit (0-1023) | 12-bit (0-4095) |
| Price (India) | Rs 350-500 | Rs 400-600 |
| Programming | Arduino IDE | Arduino IDE (same syntax!) |
When to upgrade to ESP32:
- You need WiFi or Bluetooth (IoT projects, web dashboards, phone control).
- You need more processing power (signal processing, running a web server).
- You need more memory (data logging, complex programs).
- You need more pins (projects with many sensors and actuators).
The best part: the ESP32 is programmed using the same Arduino IDE and almost the same syntax. Everything you learn with Arduino transfers directly. Check out our range of ESP32 boards at wavtron.in.
Essential Resources for Learning
Official Documentation
- Arduino Reference: https://www.arduino.cc/reference/en/ — complete language reference for every function.
- Arduino Tutorials: https://docs.arduino.cc/built-in-examples/ — official examples with wiring diagrams.
Community Forums
- Arduino Forum: https://forum.arduino.cc/ — ask questions and search thousands of answered threads.
- Reddit r/arduino: https://www.reddit.com/r/arduino/ — active community with project showcases and help.
- Stack Overflow Arduino tag: Great for specific coding questions.
Video Learning
- Paul McWhorter's Arduino series on YouTube — one of the most thorough free courses available.
- GreatScott! — excellent electronics fundamentals alongside Arduino projects.
Wavtron Resources
- Browse our full range of Arduino boards, sensors, motors, and modules at wavtron.in.
- Follow us for upcoming tutorials, project guides, and new product announcements.
What to Do Next
Here is a practical roadmap after finishing this guide:
- Build the Blink sketch and modify the timing. Get comfortable uploading code.
- Add a button and control the LED. Understand digital input.
- Connect a potentiometer and watch values in the Serial Monitor. Understand analog input.
- Combine them: control LED brightness with the pot. This is your first real circuit.
- Pick a project from the list above and build it. You will learn more from one real project than ten tutorials.
- Join the community. Post your projects, ask questions, help others.
The most important thing is to start building. You do not need to understand everything perfectly before you begin. Every mistake is a lesson, and the Arduino community is one of the most welcoming in all of tech.
Happy building!
Need components for your first Arduino project? Browse our collection of Arduino boards, sensors, jumper wires, breadboards, and starter kits at wavtron.in. We ship from Bengaluru to all pin codes across India.